A few weeks ago I hit a wall. I was flat out exhausted and couldn’t physically bring myself to send another email.
Needless to say, I desperately needed a break from work.
If I had to guess why, I’d say it’s pretty obvious (and probably true for all of us) — I had worked for three weeks straight and I was absolutely tanked. And as much as I love endlessly staring at my computer and hacking away at my keyboard, work was getting old really, really fast.
So, I thought to myself “why not go camping. Take some time for yourself and get away.”
And, well, after thinking it over for a whole five minutes, I decided to do just that.
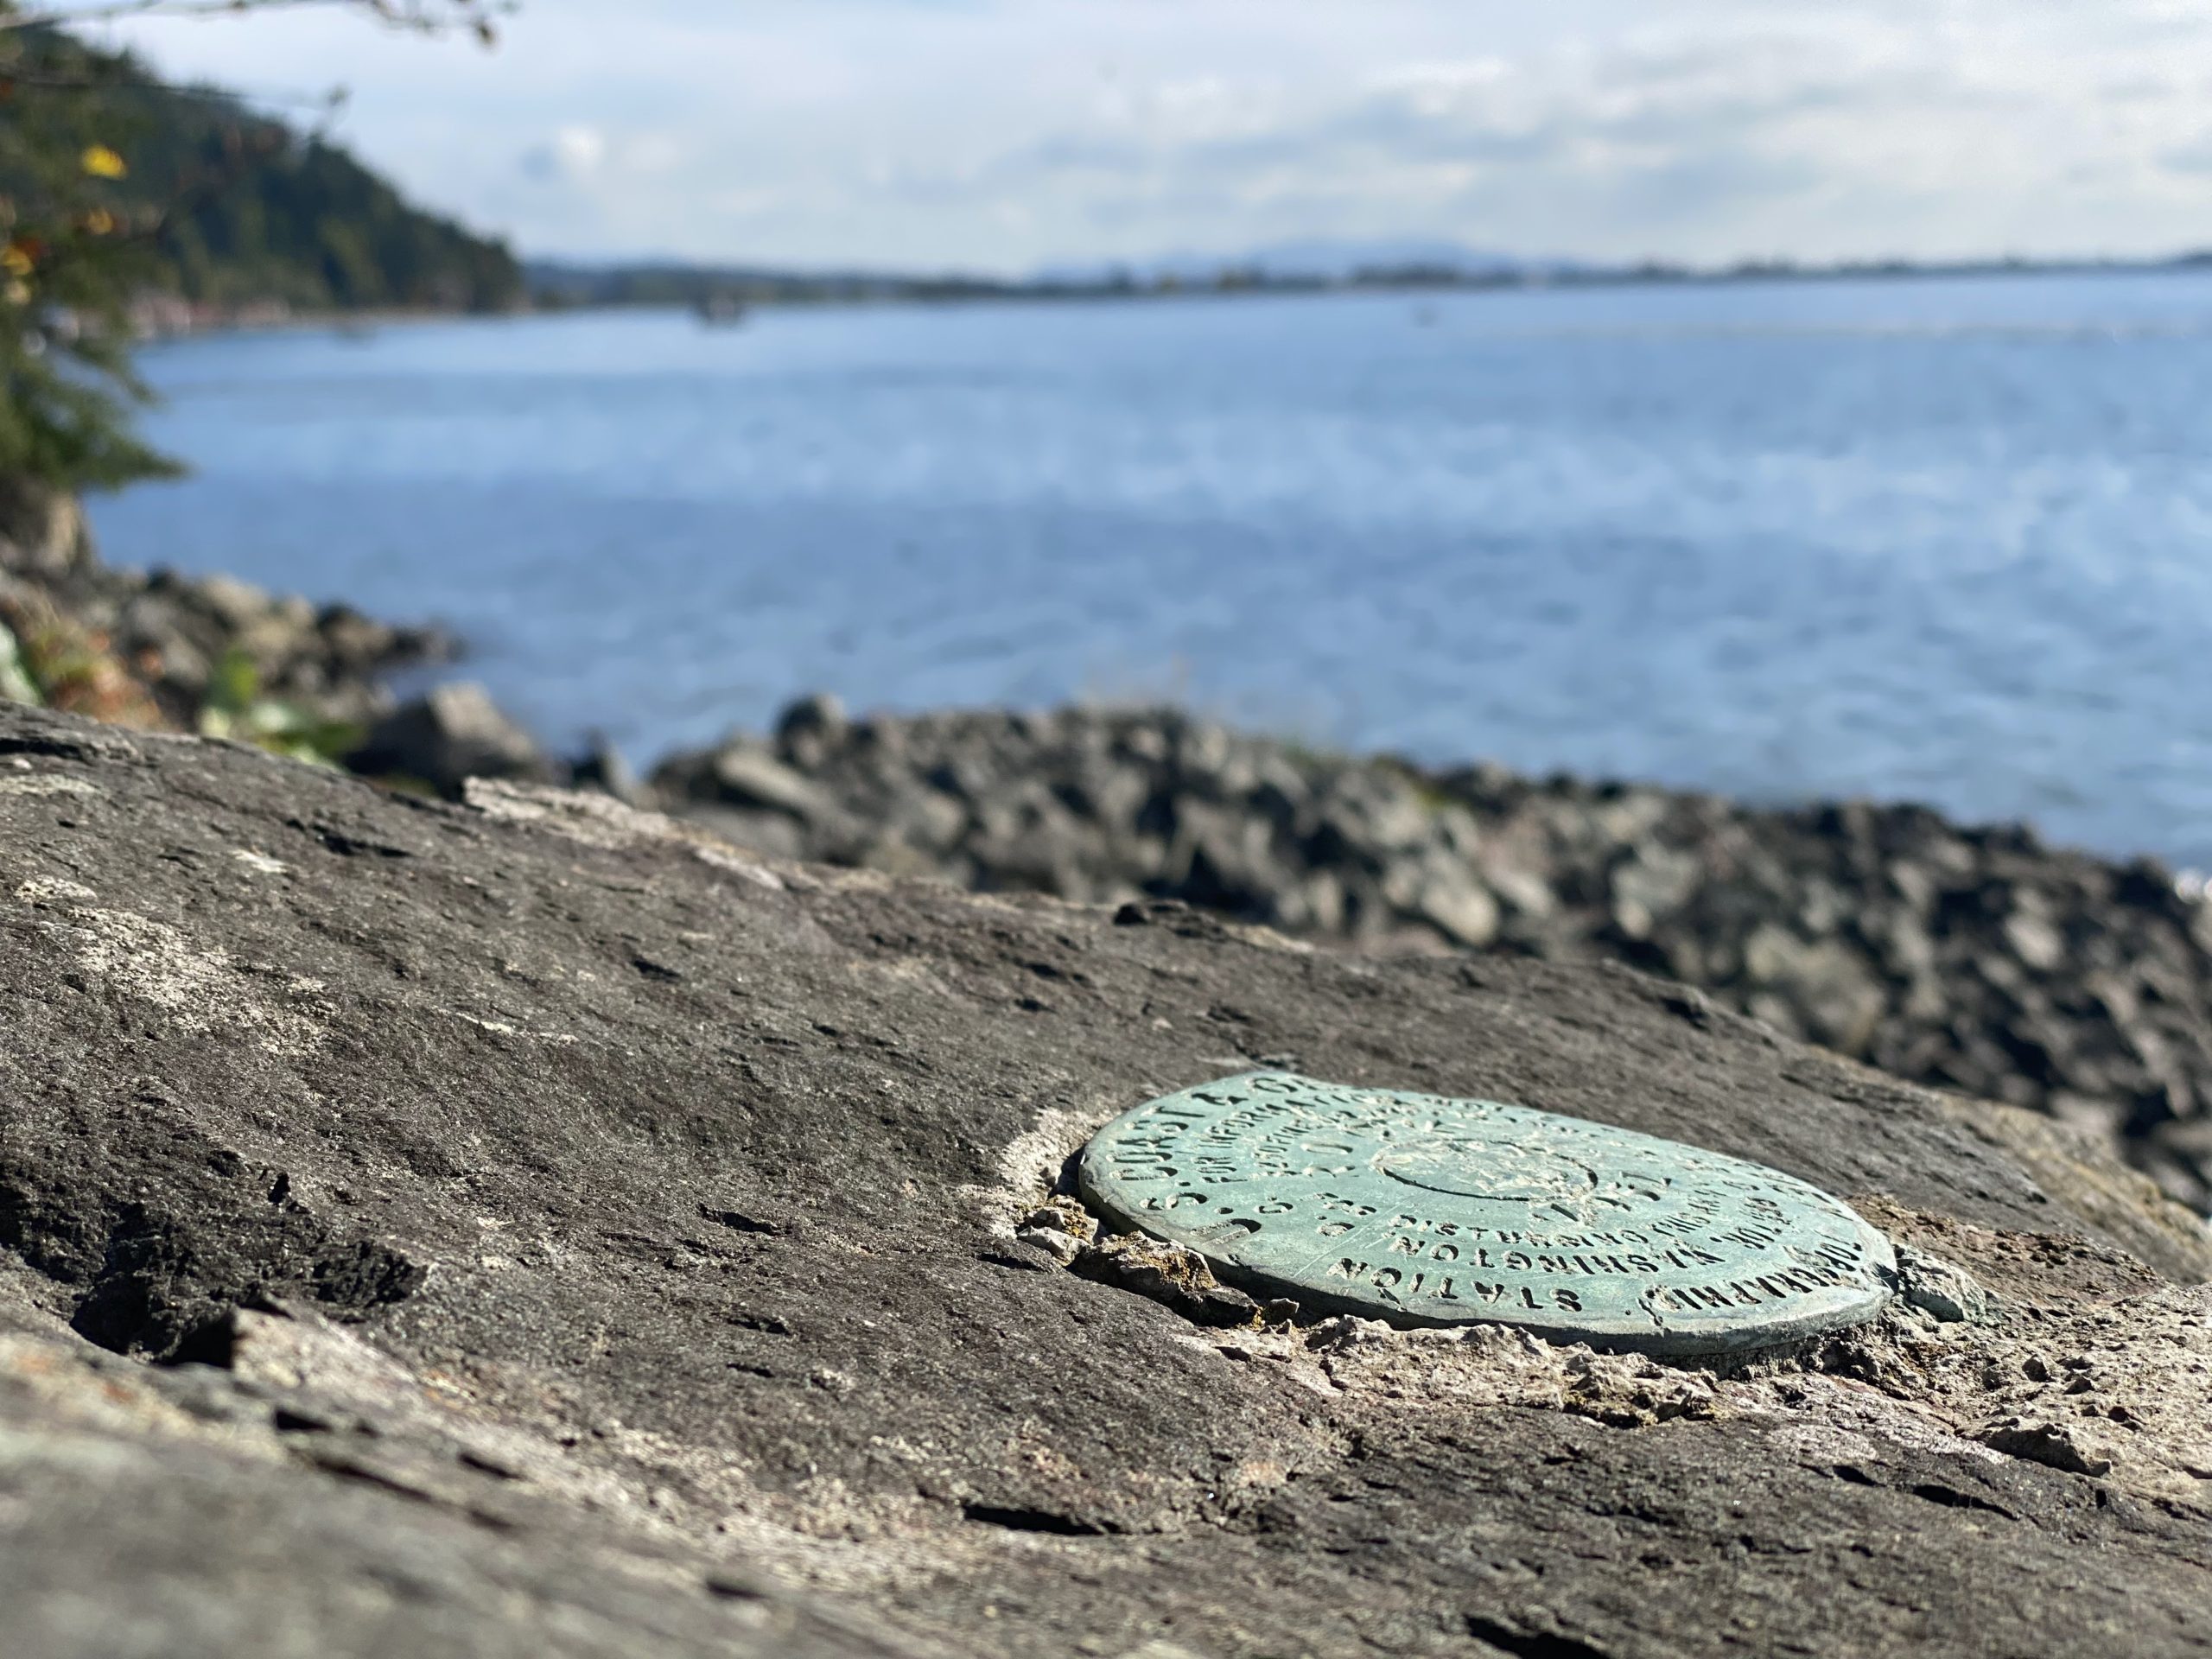
I drove out to Northern Washington with my dog and camped underneath a cliff overlooking Samish Bay that was only accessible during low tide (and FYI, probably one of the coolest places I’ve ever camped). It was secluded, beautiful, relaxing, and exactly what the doctor ordered.
But what made the trip unique, however, wasn’t the impressive scenery, my dog getting in a fight with some sort of small animal (raccoon maybe?), or the fact that I was able to harvest my own oysters, it’s what I found while I was out there.
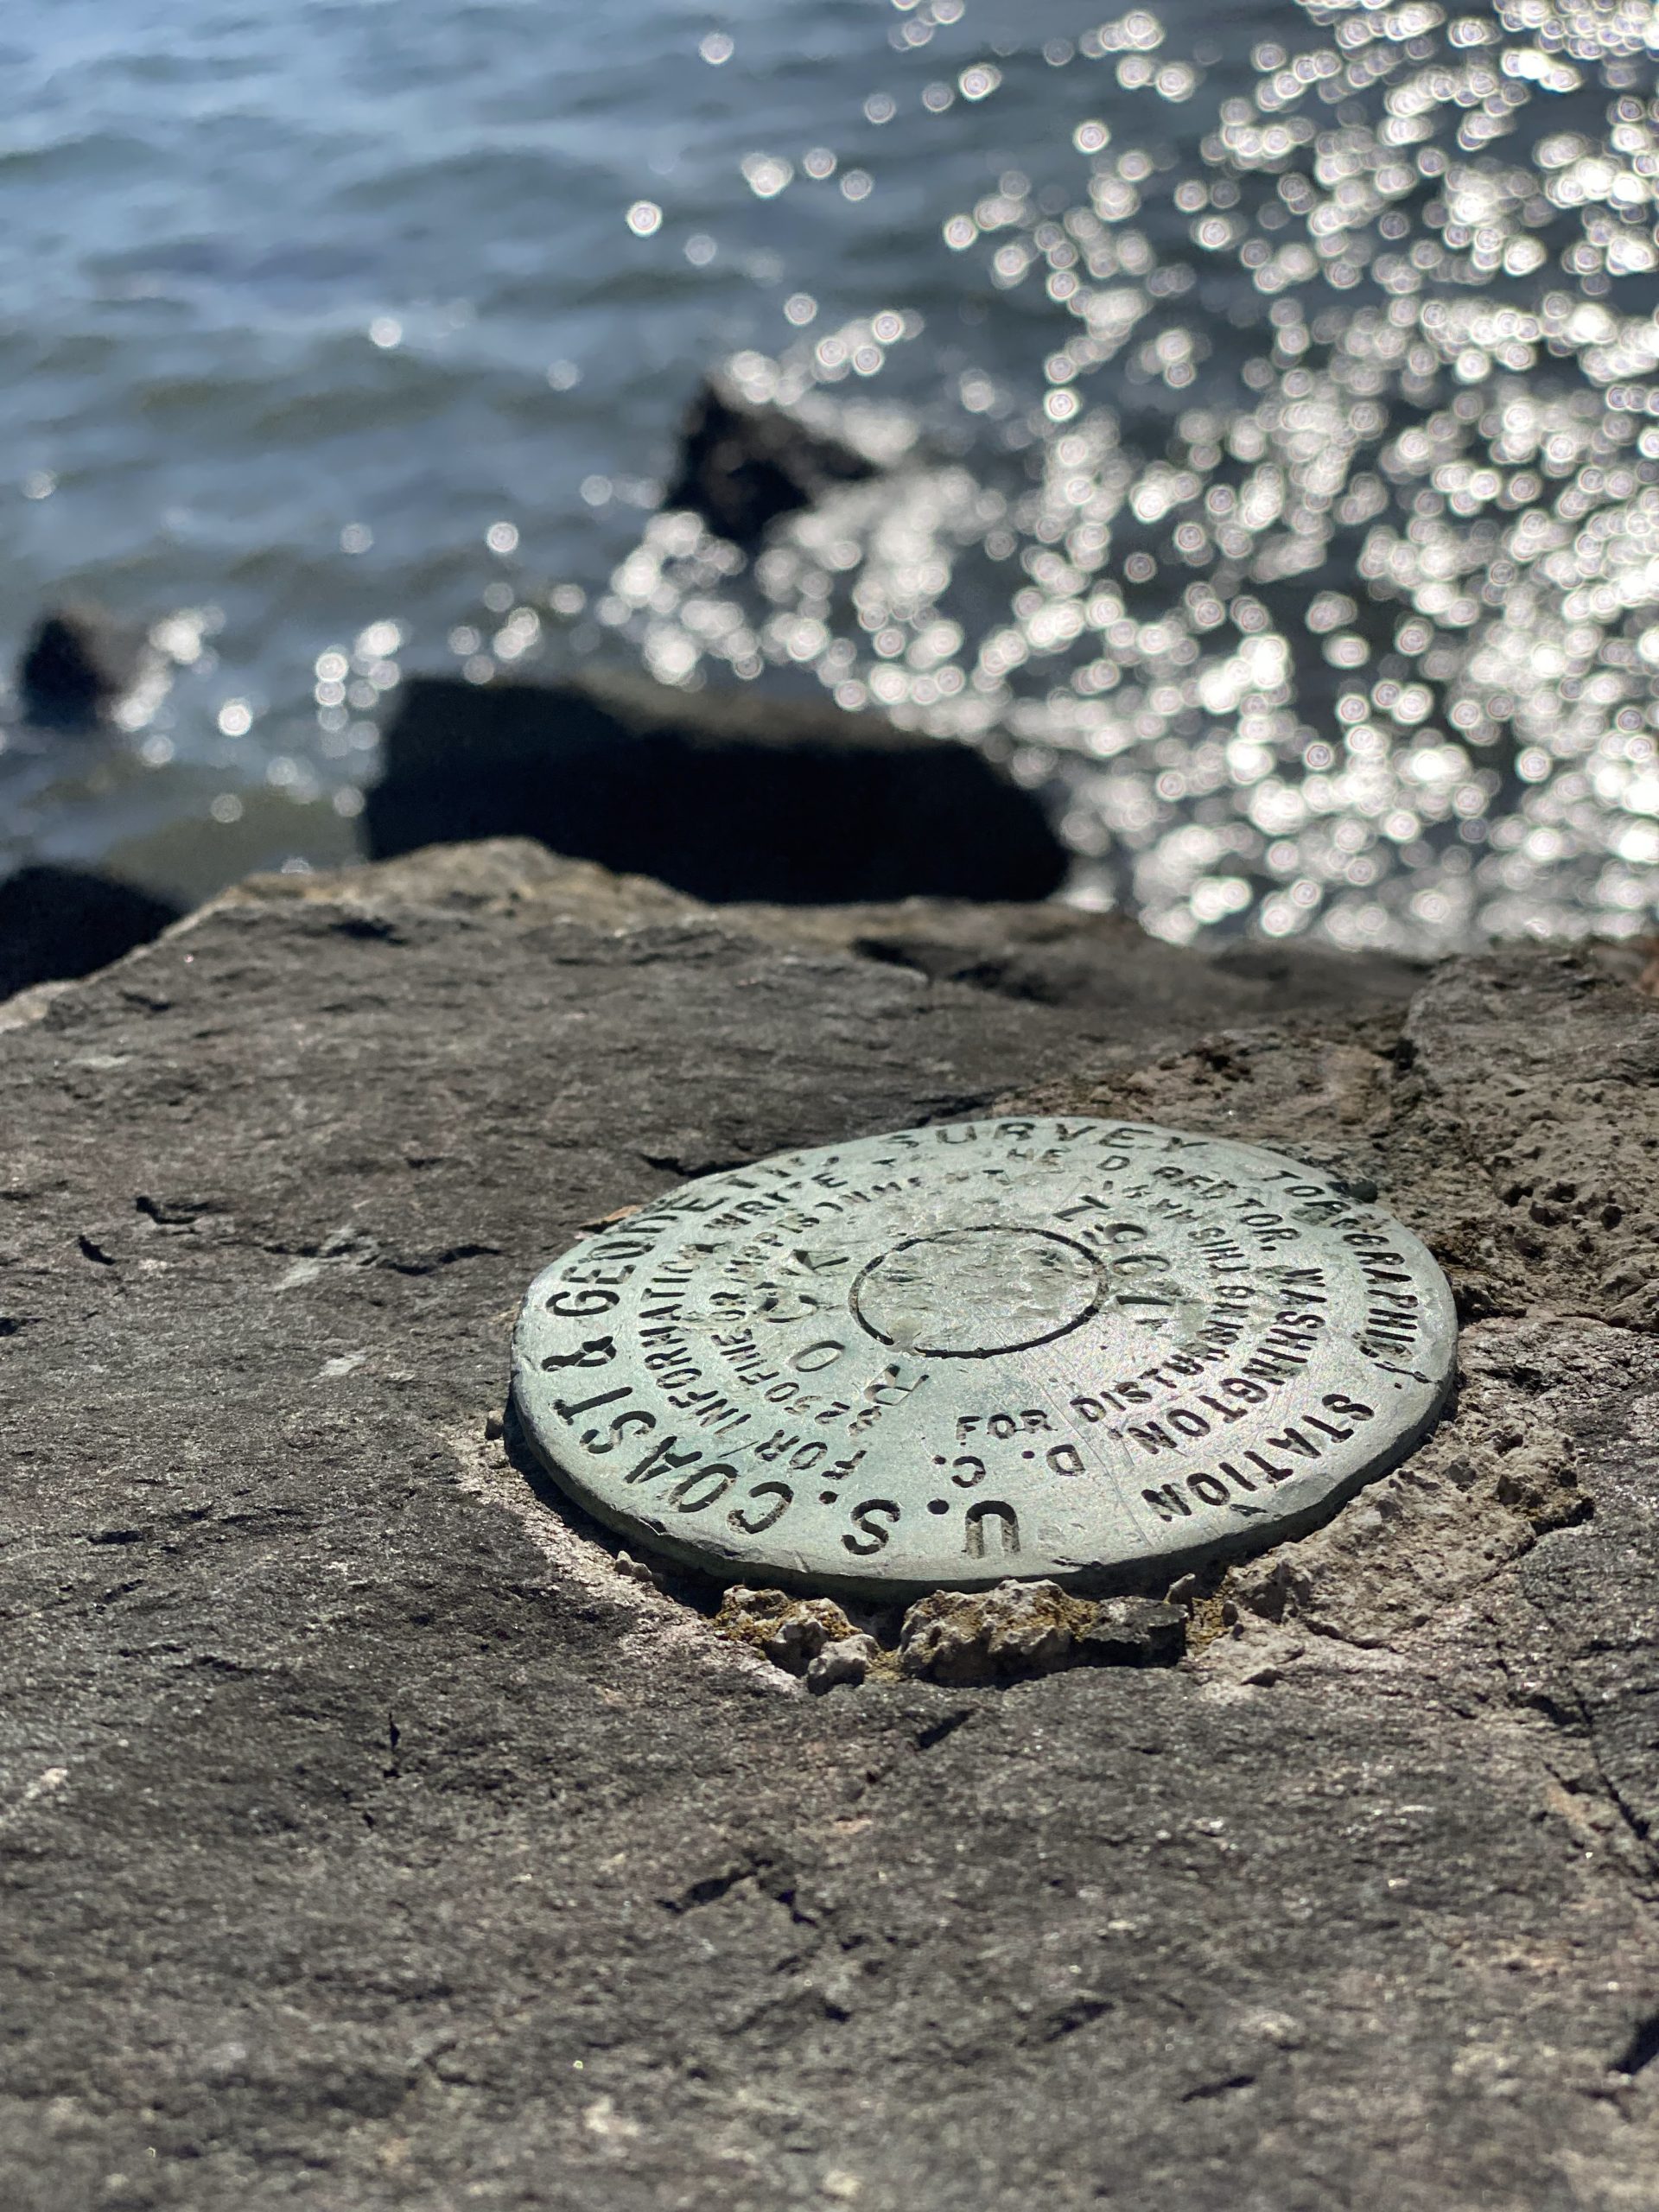
And that something just so happened to be a little metal disc nestled into a boulder with some words scribbled on the top of it that read — U.S. Coast and Geodetic Survey Topographic Station – 1951.
Fast forward to a little Google action on my end, and it turns out that that disc is what the National Geodetic Survey (NGS) calls a benchmark — a little piece of history that was used for early survey work.
What is a Benchmark in Surveying?
A benchmark (sometimes referred to as a “bench mark” or “survey benchmark”) is a known position on the Earth’s surface that’s used as a highly accurate reference point.
Used by cartographers, engineers, land surveyors, and other professionals, these points provide an exact location so that other locations can be compared, assessed, or measured in relation to it.
Usually marked by a metal disc, a carving, a metal rod, or something else that’s semi-permanent, most of the markings are part of a geodetic control network maintained by the National Oceanic and Atmospheric Administration’s National Geodetic Survey (NGS).
In a broad sense (and for purposes of this article), the term “benchmark” typically refers to points that mark both elevation (think vertical control points) and longitude/latitude (think horizontal control points).
But in survey work, however, they divide these points into two separate groups — elevation points are called “benchmarks” while longitude/latitude points are called “stations” or “marks.”
Regardless of the actual definition, however, if you’re not in a survey profession, it’s probably safe to call any of these markings benchmarks.
And, as these “benchmarks” can be found all over the United States and have been in existence and used for nearly two centuries, they’re pretty fun to hunt.

What is Benchmark Hunting?
Benchmark hunting (or benchmarking) is exactly what it sounds like — it’s basically going outside and searching for one of these historic markings.
But what do you do once you’ve found one? Well, unlike geocaching where you use GPS coordinates to find random items hidden by other people, in benchmark hunting, you search for the marker and then take a picture of it and report its condition to the National Geodetic Survey (NGS).
And that’s what makes benchmark hunting so unique — not only are you able to find little bits of history on your adventure, but you’re able to record history while you’re at it.
Additionally, because they can be found almost anywhere — a farm, a mountain, the middle of a city, someone’s backyard — they’re set up for any level of exploration.
Take, for example, the one I discussed earlier — not only was it placed along an unpopulated coastline, but it was on top of a rock, at the bottom of a cliff, in an area that was only accessible during load tide — a pretty remote location to say the least.
Here’s How To Get Started
If you want to start benchmark hunting yourself, follow these steps and make use of the National Geodetic Survey Data Explorer.
Step 1:
Open the map that I’ve linked to below. Follow the directions on the map and search for a particular location that you’re interested in.
Step 2:
Once you’ve found a benchmark worth hunting, click on it and then open the datasheet link.
What’s a datasheet? — it’s basically a description of the mark’s location. Because most of the points were put in place before modern GPS systems were invented, the datasheet description is your best way to find your selected benchmark.
Step 3:
Observe the location and description carefully — is it on public or private property? Is it accessible by foot? — If it’s in a pretty hard-to-get-to place, then start planning accordingly. If it’s on private property, either get permission from the property owner or find another benchmark to hunt (never hunt on private property without permission).
Step 4:
SCREENSHOT OR PRINT OFF YOUR DATASHEET!
Your datasheet is the best way to find your point. Use the datasheet to determine its location — look at the attached pictures (if available), read the description, and read the updates.
Step 5:
Make necessary preparations and start hunting.
Depending on where your benchmark is, you’ll need to prepare accordingly. If it’s in the middle of the woods, treat it like any other hiking adventure. If it’s smack dab in the middle of the city, well, bring some extra cash for a hot coffee.
Step 6:
Record and log the benchmark.
This is what makes benchmark hunting worth it. Once you’ve successfully found your benchmark, take a picture of it and take some notes. When you get home, log onto the National Geodetic Survey’s Survey Mark Recovery page, follow the directions, and upload your new-found information.
Benchmark Locations Map: The National Geodetic Survey Data Explorer
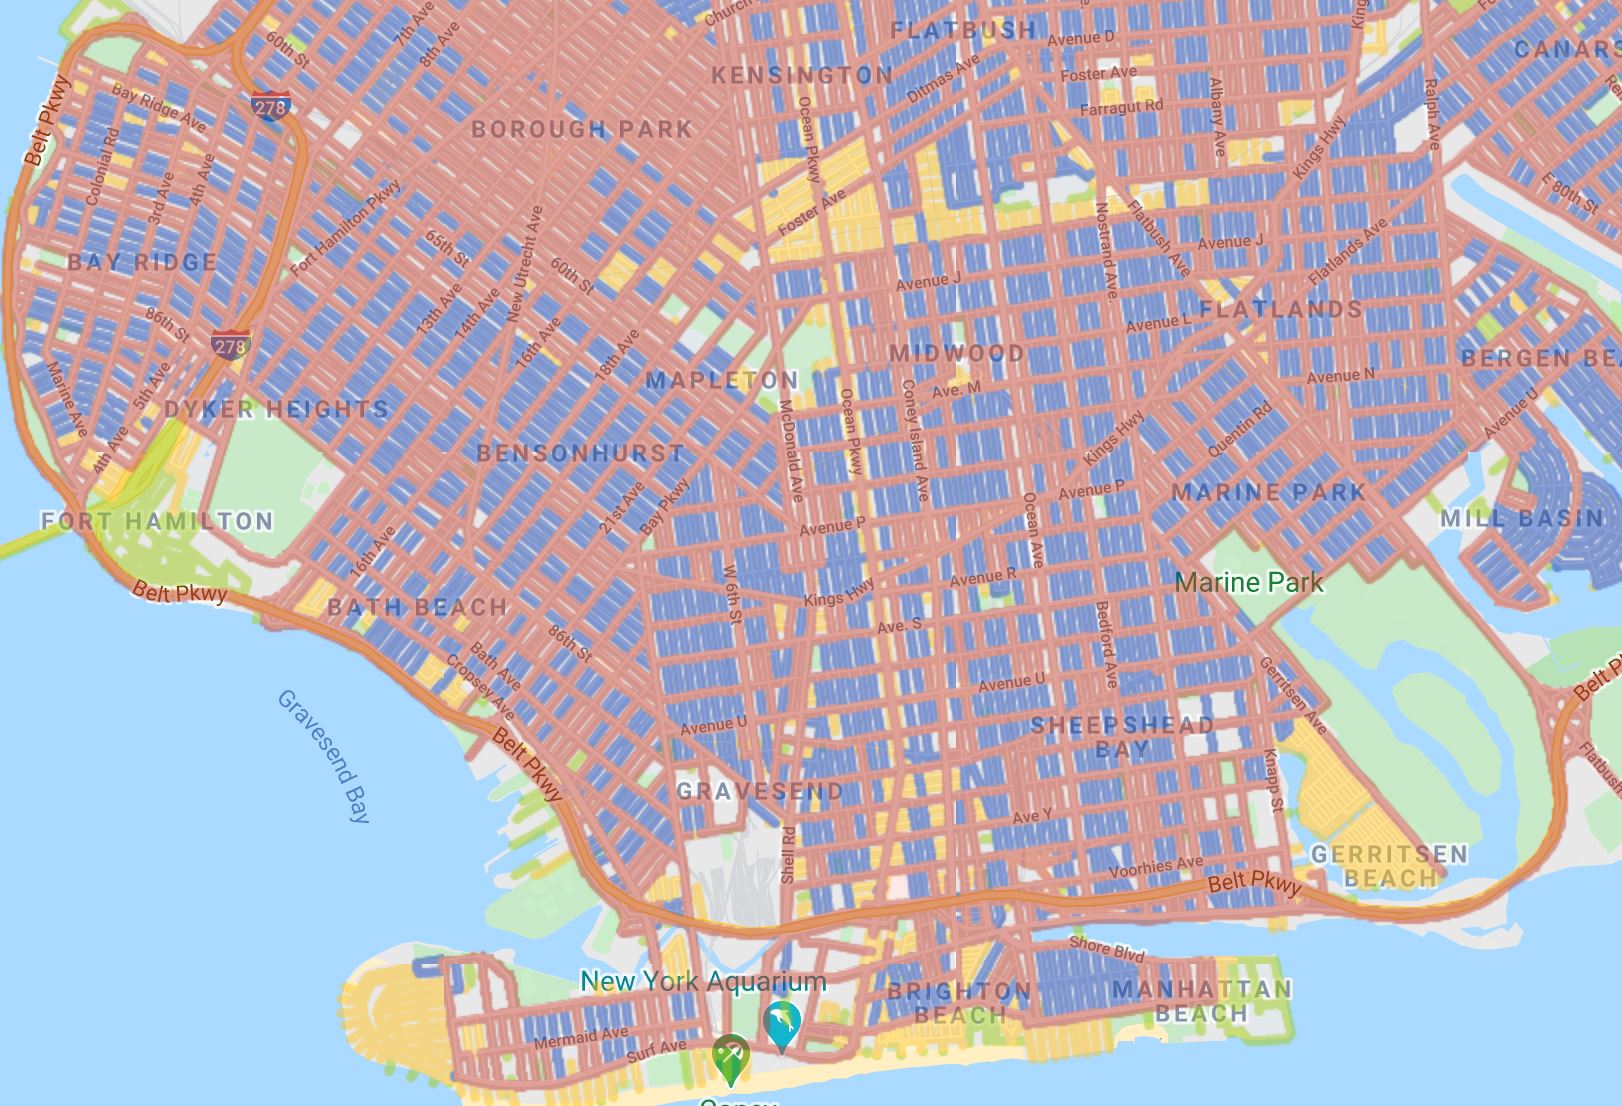
There’s really only one map you’ll need to find benchmarks — NOAA’s National Geodetic Survey Interactive Retrieval Map.
Once you’ve opened the map, either follow the directions on the initial prompt (can be a little overwhelming), or do one of two things (at least this is what I’ve found as easiest).
(1) – zoom in to an area you want to explore and then hit the drop-down “map layers” on the left-hand side. Once the menu is dropped, click “find marks.”
(2) – click the drop-down “go to location” on the left-hand side of the map and then hit “geographic location.” Type in the city or area that you want to see and it will take you there.
And just to add an important note here, the map works best with a desktop or laptop computer; from my experience, it isn’t very user-friendly for mobile users.
You’re Ready to Start Benchmark Hunting
And there you have it, you’re ready to start hunting.
If it seems intimidating at first, don’t worry, start off small and work your way up to bigger and better hunts. As discussed above, there’s really no one hunt that’s the same and because the markings are everywhere, there are differing levels of experience required. Start small and work your way up!
Just remember to take all necessary precautions, and most importantly, have fun along the way.
Oh, and if you do find you’re benchmark, remember to take a picture of it and log it into the system. The more these things get updated, the better the experience for everyone else.
FAQ
If you would like to use a GPS to get there initially, you can, but remember that the datasheet is your most important asset. Look at the description found on the datasheet — this will help you the most.
Sometimes yes and sometimes no. Depending on where it is and the description provided, their accessibility can vary. Additionally, sometimes they can be hard to uncover from years and years of sitting in the elements. If you suspect one’s been buried, use a small shovel to uncover it.
No, the benchmark will not always be there. If you’ve searched around and can’t find one, update the NGS and let others know that it’s missing.
Yes, there’s plenty, search around on Google for the latest information.
Depending on your trip, I’d prepare for the worst and hope for the best. If you’re hunting in the outdoors, bring equipment that fits this setting. If you’re hunting in the city, then bring some extra cash. Additionally, bring some small tools — such as a screwdriver — in case you need to pry a lid off or scrape some dirt off of a marking.
Yes, geocaching.com is extremely useful for benchmark information. Find it here.
According to NOAA, the attributes are listed as follows:
PID – The PID of the mark with a hyperlink to the Datasheet
Name – The name of the mark
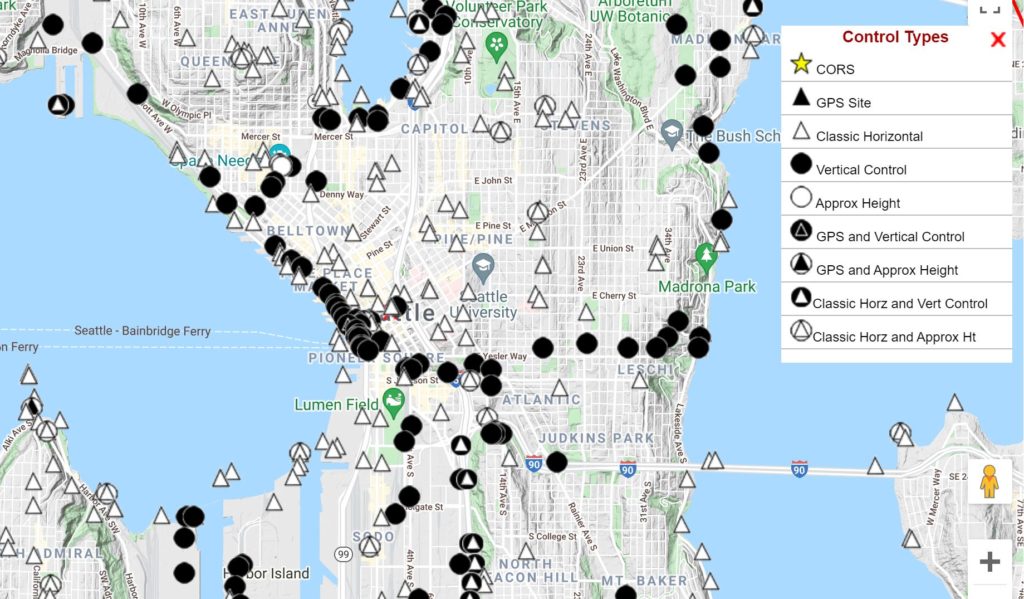
Control Type – The type of control the mark is plotted on the map
**Read the Symbology section of Help for more information
Elev Source – Lists the source of the elevation
V Order – The Vertical Order of the bench mark
Pos Source – Lists the source of the position
HOrder – The Horizontal Order of the mark
Ortho Ht – The Orthometric Height (Elevation) of the mark
Ellip Ht – The Ellipsoid Height of the mark if it has been GPSed